Portraying Artifacts: an Alternative to Traditional Inking
By Stephanie Gandulla
The examination and analysis of artifacts is a vital part of the maritime archaeologist’s job. One measure of success for this analysis is quality visual representation of artifacts. In my graduate studies in maritime archaeology at East Carolina University, I have found that digitally rendering artifacts is an excellent technique to faithfully portray artifacts and create artistic archaeological drawings.

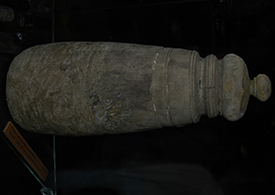
Base image (cropped and reduced for display). Click here to see large view of both images.
The method that I will share here is one that I am using to portray almost 200 pieces of treenware (wooden tableware) recovered with the Swedish warship Vasa. With over 40,000 associated artifacts, Vasa, which sunk in 1628, presents an amazing opportunity for scholars from many disciplines. The examination of Vasa’s treenware collection, which includes spoons, plates, bowls, tankards and jars, will broaden our understanding of seventeenth century maritime culture, both in Sweden and in the larger context of Northern Europe. Quality visual presentation, which will ultimately be available for others to study, will aid in this understanding.
There are a number of different graphic software programs that can be utilized, but here I address Adobe Photoshop® and use a process based on two Electronic Darkroom Articles by Wayne C. Smith. The first step is to take a digital photograph of an artifact. An advantage of this particular process is that the photo does not have to be a high quality image to produce a high quality drawing. Next, proceed with the following steps:
- Upload the image as a .jpg file and open in Photoshop®.
- Copy, save and lock the background layer so the original is always available.
- Adjust the tonal range of the image to make it easier to discern shadows and more clearly delineate the artifact from the background. To do this, go to the "Image" tab on the toolbar and select "Adjustments" from the drop down menu. Within "Adjustments" there are a number of techniques; experiment with Brightness/Contrast, Levels, and Curves.
- Once the image is satisfactorily adjusted, use the magnetic lasso tool to select the outline of the artifact. This takes patience and a steady hand!
- Next, copy and paste the lassoed object into a new Photoshop® document. This will provide you with a clean white background. Make sure that the new document is the correct dimensions and resolution for your final product.
- Go to your toolbar once again and click on Image. Select Mode and then Grayscale.
- Go back the toolbar and click on Filter. From the drop down menu under Stylize, select Find Edges.
- Again, use various Adjustments (under Image on toolbar) to highlight diagnostic details such as grain, deterioration, wear, markings, tool marks, etc. Different characteristics become more or less evident with various levels and combinations of adjustments. Consider using a new layer for each adjustment to keep track of your changes.
- Once you are satisfied with your new digital archaeological illustration, simply add a scale and labels with line and text tools.
Digitally creating quality archaeological artwork is straightforward, fun to experiment with, and encourages increased levels of analysis. Once mastered, it is also takes very little time. This leaves time for more fieldwork!
NOTE: Keep in mind that your illustration will still have photographic perspective and will not quite be an orthographic projection.
Thank you to the Vasa Museum for the opportunity to study the treenware of a seventeenth-century Swedish warship.
Transforming Images
By Nicole Wittig
Archaeology is a demanding field requiring creative and inventive minds. The archaeologist continually adapts technology from varying professions and applies it to his or her own research questions. For History 6835: Advanced Archaeological Techniques and Methods, Dr. Nathan Richards (East Carolina University) called upon students to adapt software generally used in the graphic design industry and apply it to an archaeological project. Digital inking, the term for the assignment, consisted of transforming pen and ink drawings or photographs, standard archaeological recording methods, into a digital media using the Adobe Suite of products. The assignment was designed to have students evaluate the pros and cons of each technique and think about how each changes the recording methodology; ultimately the most important facet of archaeological illustration is accurate presentation of data and not just creating a pretty picture.
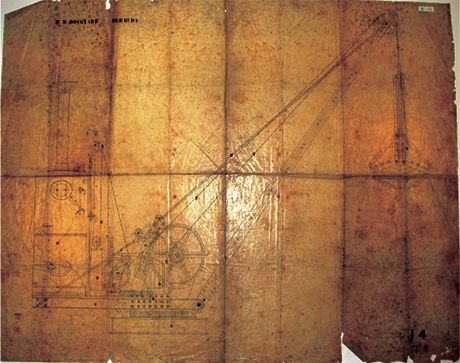
For the assigned task, I was presented with mechanical plans of a hopper barge and a hopper barge crane, the center of study from a 2008 ECU field school. Initial work with the plans proved difficult because I only had a photograph of the plans and not an actual scan. Manipulation of the photos began in Adobe Photoshop®, where the photos were adjusted to remove the angle at which the photo was shot. The next chore in Photoshop® was to correct for folds in the paper, accomplished by cutting and pasting the pieces back into place. Finally I desaturated the color photos, believing that the black and white would reveal more detail and be easier to distinguish. After these steps, the photos saved as .jpgs were then uploaded into Adobe Illustrator®. This program proved to be the best way to create a clean lines drawing from the original plans. Illustrator's features allowed me a greater freedom to manipulate line thicknesses and line opacity, adding emphasis to important structural components. Such control over the drawing is not always possible when using pen and Mylar. Another disadvantage of pen and ink is the time involved in waiting for ink to dry. With the digital process, work advanced regardless of the complexity of the drawing. The final product was a crisp reproduction of the original drawings derived from a simple snapshot of the originals. In some respect I felt as though I created digital archaeology by salvaging these mechanical plans not from the ground, but the cabinet.

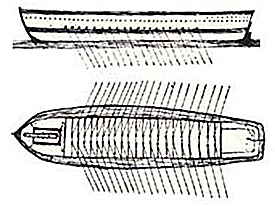
A photo of the original J. & A. Blyth blueprint of the barge from the Bermuda Maritime Museum. Click here to see finished drawing.

A photo of the original J. & A. Blyth blueprint of the crane from the Bermuda Maritime Museum. Click here to see finished drawing.
References
Knoerl, Kurt
2010 Adobe Photoshop® Workshop, 20 February, East Carolina University, Greenville, NC.
Smith, C. Wayne
2006a The Electronic Darkroom: Turning Bad Photographs into Useful Line Art. Technical Briefs in Historical Archaeology 1:1-5.
2006b The Electronic Darkroom: Improving Artifact Presentation. Technical Briefs in Historical Archaeology 1:6-10.
Return to In The Field home page.
Comments, suggestions, or questions can be directed to research@themua.org


